DietPi is lightweight Linux operationg system for single-board computer. It is based on Debian Linux.
The default PHP version in DietPi (6.23) is PHP 7.0. It is not posible to install new versions of some aplications, like Nextcloud 16, because they want newer version of PHP. In the next few lines how to upgrade PHP to version 7.3 and install Nextcloud 16 in DiePi 6.23 is described.
*Note: Thе description is made using a freshly installed DietPi system without any other application. Be careful if you have an existing system that can damage it.
————————–
Let’s start:
- Add repos for PHP 7.3:
apt install ca-certificates apt-transport-https
wget -q https://packages.sury.org/php/apt.gpg -O- | sudo apt-key add –
echo “deb https://packages.sury.org/php/ stretch main” | sudo tee /etc/apt/sources.list.d/php.list
apt update
apt upgrade
- View list with previous installed php modules, if any:
dpkg –get-selections | grep -i php
For example you may see something like that:
php-apcu php-common php-igbinary php-redis php7.0-cli php7.0-common php7.0-curl php7.0-fpm php7.0-gd php7.0-intl php7.0-json php7.0-mbstring php7.0-mcrypt php7.0-mysql php7.0-opcache php7.0-readline php7.0-xml php7.0-zip
- Install the PHP 7.3 and modules that you need:
apt install php7.3 php7.3-cli php7.3-common php7.3-curl php7.3-fpm php7.3-gd php7.3-intl php7.3-json php7.3-mbstring php7.3-mysql php7.3-opcache php7.3-readline php7.3-xml php7.3-zip php7.3-bz2 php7.3-ldap php-apcu imagemagick php-imagick php-smbclient libapache2-mod-php7.3 php7.3-recode php7.3-tidy php7.3-xmlrpc
After that restart the system:
shutdown -r now
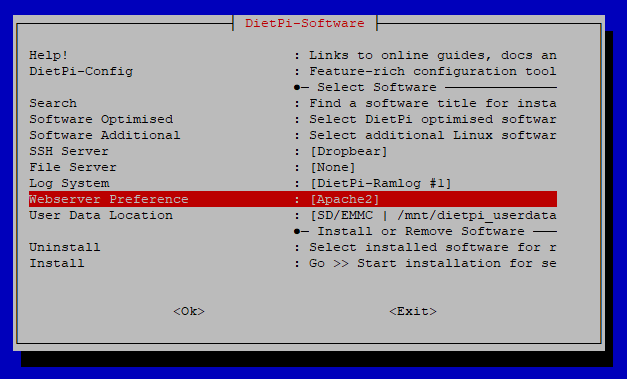
- Now start dietpi-software and change default web server to apache2:
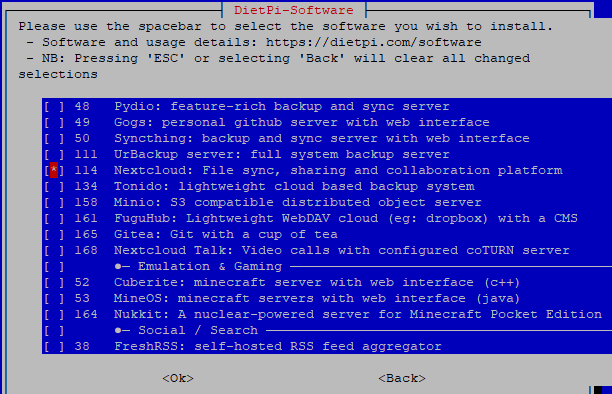
- Now in the dietpi-software go to Software Optimized and mark Nextcloud for installation:
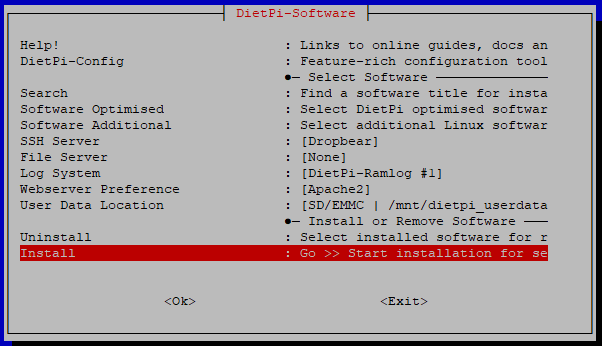
and go to Install option to start with installation process:
6. When the installation finish, if you have previous installed PHP 7.0 and modules, it is time to remove them:
apt purge php7.0-cli php7.0-common php7.0-curl php7.0-fpm php7.0-gd php7.0-intl php7.0-json php7.0-mbstring php7.0-mcrypt php7.0-mysql php7.0-opcache php7.0-readline php7.0-xml php7.0-zip
7. Now disable mpm_event and activate php7.3 apache modules
a2dismod mpm_event
a2enmod php7.3
systemctl restart apache2
8.Open your web browser and if everything is installed properly you can log in to your nextcloud:
http://use-your-ip-address/nextcloud
the default login name is admin, and password is dietpi
9. After login in nextcloud, go to Overview page in the Administration Setting and check if there are some varning and errors like these:
——————————–
There are some warnings regarding your setup.
The PHP memory limit is below the recommended value of 512MB.
Accessing site insecurely via HTTP. You are strongly adviced to set up your server to require HTTPS instead, as described in the security tips ↗.
The PHP OPcache is not properly configured. For better performance it is recommended to use the following settings in the php.ini:
opcache.enable=1
opcache.enable_cli=1
opcache.interned_strings_buffer=8
opcache.max_accelerated_files=10000
opcache.memory_consumption=128
opcache.save_comments=1
opcache.revalidate_freq=1
————————-
To correct the warnings and errors go to DietPi terminal (command promt):
Open php.ini file:
nano /etc/php/7.3/apache2/php.ini
Find and correct the following lines like this:
opcache.enable=1
opcache.enable_cli=1
opcache.interned_strings_buffer=8
opcache.max_accelerated_files=10000
opcache.memory_consumption=128
opcache.save_comments=1
opcache.revalidate_freq=1
Change also memory limit to 512MB in this line:
memory_limit = 512M
Now save php.ini file, close it and after that restart apache2:
systemctl restart apache2
That is all!
Enjoy using your new Nextcloud!