Moodle is one of the popular e-Learning platform, maybe the most popular. It is open source and is constantly improved by large community of volunteers. More info can be found in the official website of the moodle.
In this tutorial the main steps in update process of Moodle 3.9 are described. There is also official documentation for moodle update.
Lets start!
1. Backup your existing moodle system
There are a few thing that should be backed up, before you start with moodle update:
– Moodle installed folder;
– Moodle data folder (here are all uploaded files from moodle users);
– The database (For example, your Postgres or MySQL database dump).
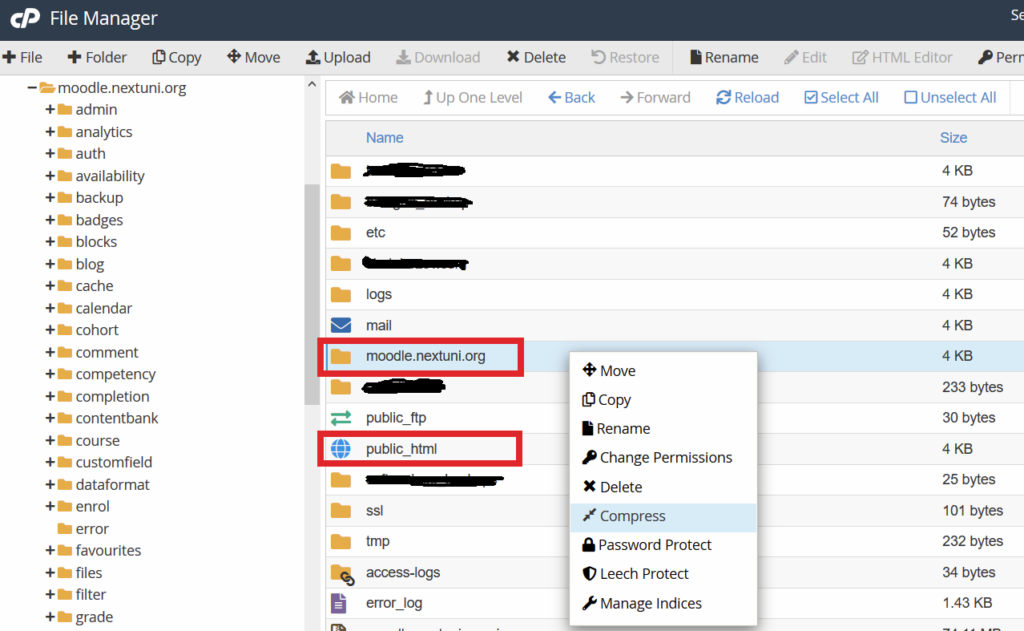
If you use web hosting with cPanel, the backup is easy. Just login to your cPanel account and use “File Manager” app to find folder where your moodle is installed (maybe is in the /public_html folder or in subdomain folder). When you find the moodle folder make an archive (right click over the moodle folder and then use “Compress” option).
When the archive is ready, download it to your local computer.
Typical view of cPanel File Manager is shown on the picture below.
If you moodle data folder is outside of moodle instalation folder (by the way this is good practice!) then backup also moodle data folder.
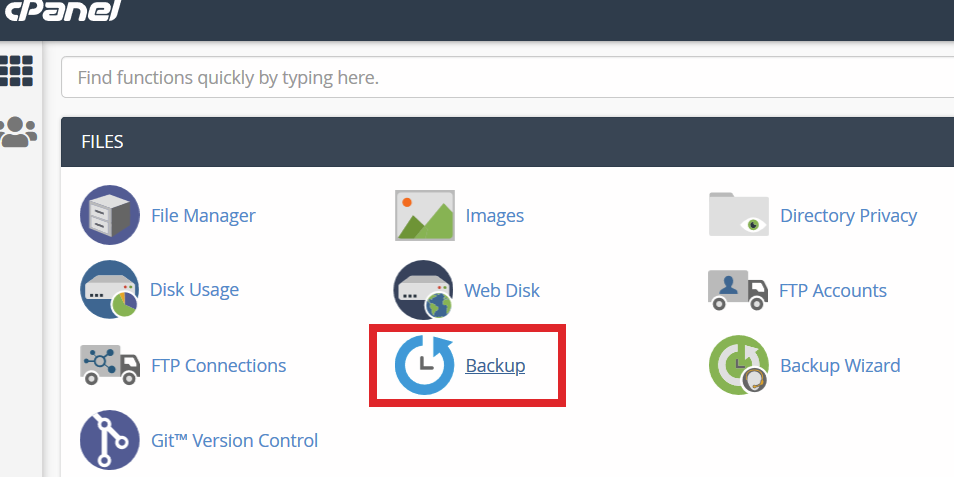
The database used for moodle also can be backed up through cPanel. Just go to “Backup” option in cPanel and from the list with all databases download the moodle database.
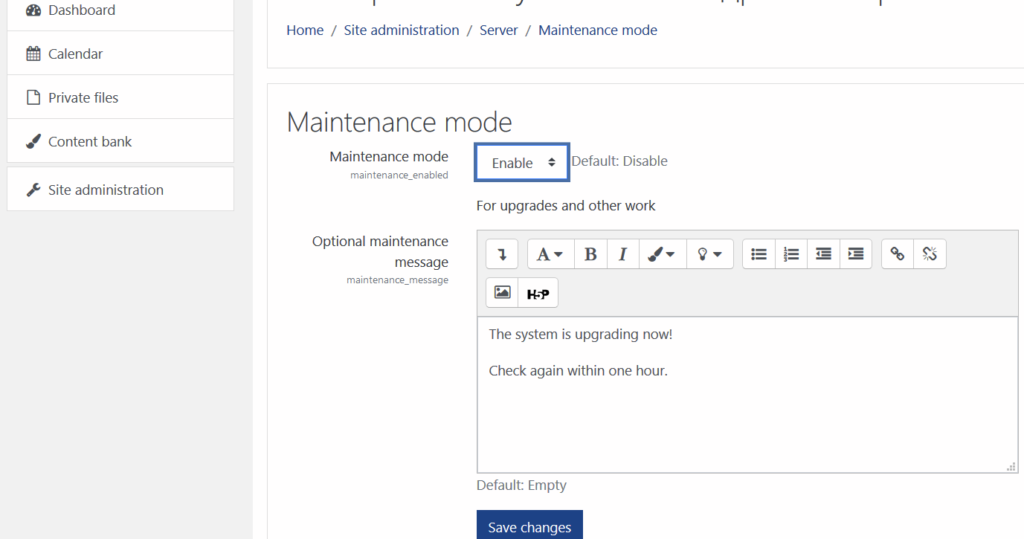
2. Activate maintenance mode of you moodle administration settings
Log in with admin user to your moodle site and go to / Site administration / Server / Maintenance mode. Change Maintenance mode to “Enable”.
3. Start with update process of moodle
– Go to https://download.moodle.org/releases/latest/ and download latest moodle version;
– Use File Manager in cPanel to upload zip archive of downloaded moodle version;
– Rename folder with your current moodle installation (for example from mymoodle.website.org to mymoodle.website.org-OLD);
– Extract the uploaded archive with latest moodle version and rename the extraxted folder to be like your original installation folder of moodle (for example from moodle to mymoodle.website.org);
– Copy your old config.php file back to the new Moodle directory;
– If you had any installed plugins on your site you should copy them from the old instalation folder to the new (default place of plugins is in …/mod folder).
4. Finish update process of moodle
– The last step is to start the update processes within Moodle.
– To do this go to web address of you moodle site and follow the update steps there (the moodle will upgrade database, will check the plugins and several other things);
– Go to Site administration > Notifications and see if there are some thing that you should do, like disable the Maintenance mode that you set it earlier!
Assuming all goes well (no error messages) then you can start using your new version of Moodle and enjoy the new features!